
Celebrate National Origami Day With Thanksgiving Spirit!
As just about every American knows, Veteran’s Day is celebrated on November 11th. But did you know that November 11th is also National Origami Day? Celebrate this wonderful craft by making a turkey to put on your Thanksgiving dinner table:
Supplies: One square sheet of paper (larger is preferred, especially if you’re a beginner)
- Fold your paper in half diagonally and then unfold. This will give you a guiding crease down the middle.
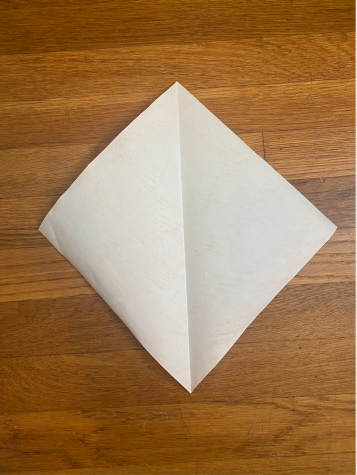
Step 1. (Esme Chiara) - Fold the left and right edges to the guiding crease.
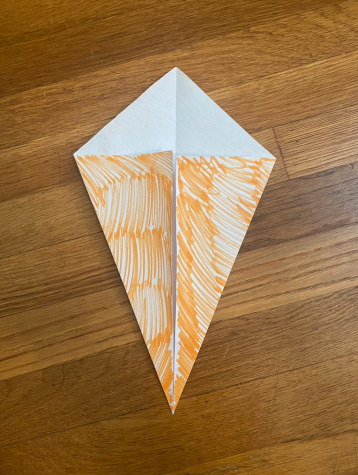
Step 2 (Esme Chiara) - Fold the top point down on top of the two flaps.
Step 3. (Esme Chiara ) - Open the left and right flaps and tuck the top flap underneath. Flip the paper to the other side.
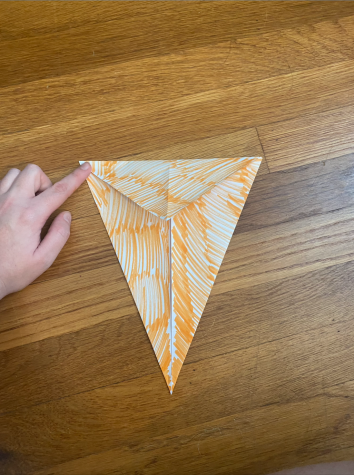
Step 4. (Esme Chiara ) - On the other side, fold the top left and right corners down diagonally so that they touch the guiding crease and form a diamond.
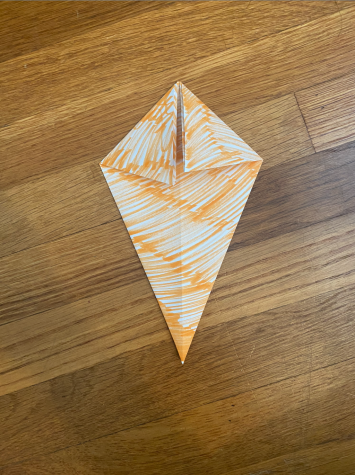
Step 5. (Esme Chiara ) - Unfold the corners you just folded (yes there is a lot of folding and unfolding in origami, I’m sorry!)
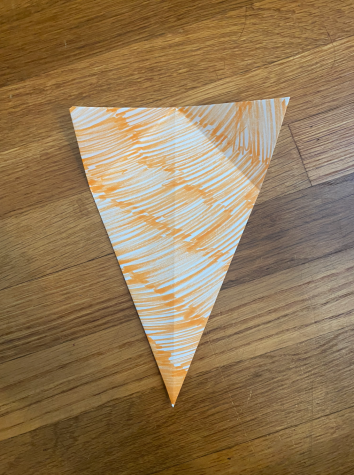
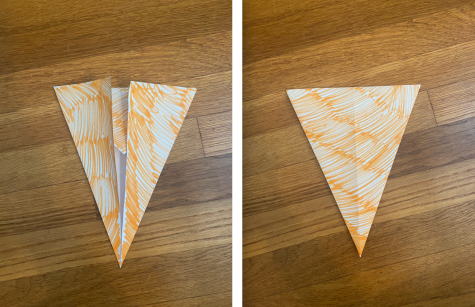
Step 6. (Esme Chiara ) - Flip the paper back over to the side you started on
- Using the top diagonal crease you just made, open the top of the right flap and bring the top of the right end down towards the middle. The bottom of the right flap should fold back to the position it was in before, and you should have a triangle sticking out (the whole top part on the right side should look like a diamond sticking out). Repeat this with the left flap.
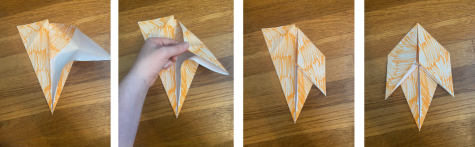
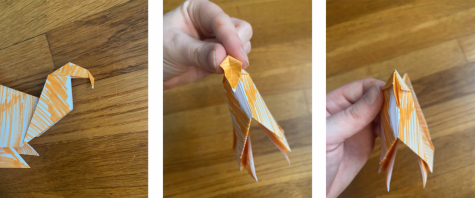
Step 8. (Esme Chiara ) - Fold the left and right top flaps outwards diagonally, and then fold those flaps down. These will be your turkey’s feet.
Step 9. (Esme Chiara ) - Fold the paper in half so that the “feet” are on the inside
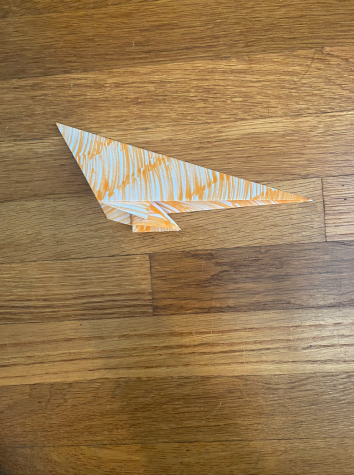
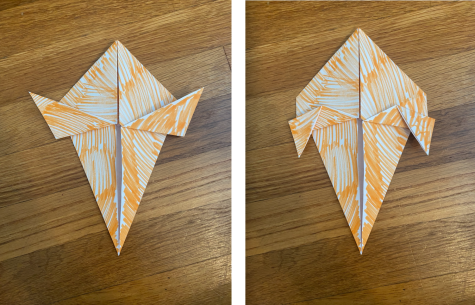
Step 10. (Esme Chiara ) - Take the shorter end and fold it upward so that the top is perpendicular to the bottom. Then unfold the end and open up the bottom slightly, flipping the end inside out so that it follows the line you just made. This is called an outside reverse fold, and they can be tricky at first so you might need to start over if your paper has been folded too much (you’ve got this!).
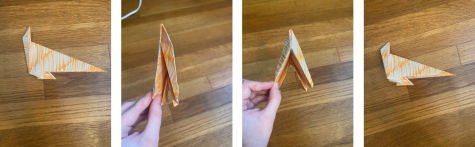
Step 11. (Esme Chiara ) - Repeat Step 11 again with the longer end. The longer end is going to be the neck and head of the turkey, while the shorter end is going to be the tail.
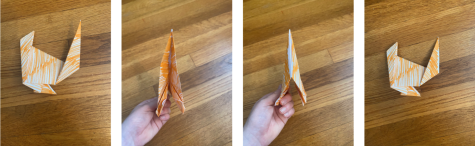
Step 12. (Esme Chiara ) - Make a crease for the head of the turkey, then do an outside reverse fold for that one.
Step 13. (Esme Chiara ) - Finally, for the beak make and INSIDE reverse fold (fold a crease downwards and unfold, then bring the tip down and pinch where the crease is)
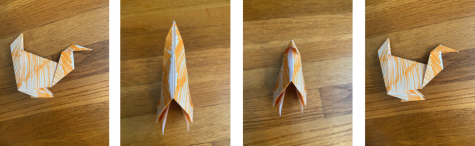
Step 14. (Esme Chiara )
Voila! Now you have the perfect decoration for Thanksgiving!


Esme Chiara is a rising senior at Mayfield Senior School and the Co-Editor-In-Chief of News and Features. A member of the Mayfield Crier since her sophomore...